I recently got a new laptop, the Asus Zenbook 14. So far, I'm quite happy with it in terms of performance, weight and price.
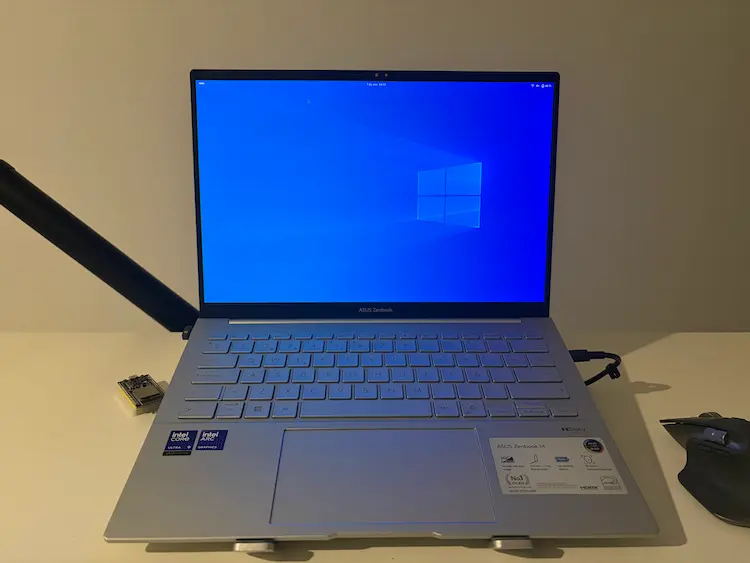
I've only run into two issues. First, Linux support for Intel's integrated graphics is still not ideal. Second, the laptop emits a high-pitched noise from inside the chassis. According to Asus, this is normal and related to the design of newer, more powerful laptops. At first, I thought it was a manufacturing defect.
I use full-disk encryption on my Linux machines, so the first thing I did was wipe the Windows installation and set up Arch Linux with LUKS2, TPM2 and Secure Boot.
This post explains why I consider this configuration worthwhile, how Secure Boot establishes trust during the boot process, and how to reproduce my setup.
Why you should use Secure Boot
If you're only interested in the configuration, head straight to the Arch linux setup tutorial.
Most Linux distributions offer disk encryption during installation, but this alone is not enough to protect against physical attacks such as Evil Maid attacks.
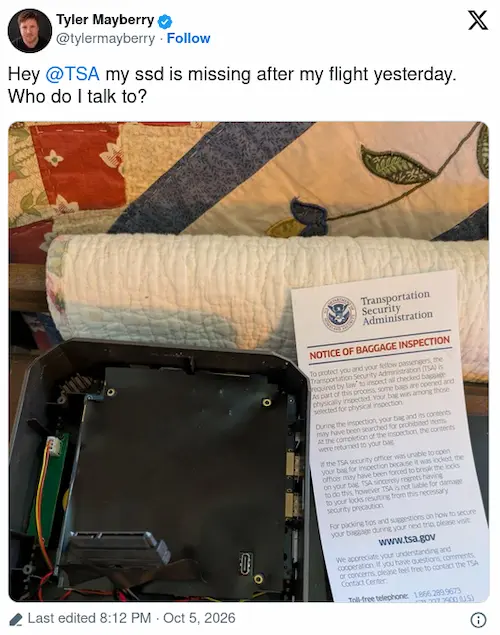
Understanding why disk encryption is necessary is straightforward. However, to understand why Secure Boot matters, we first need to look at how Linux boots.
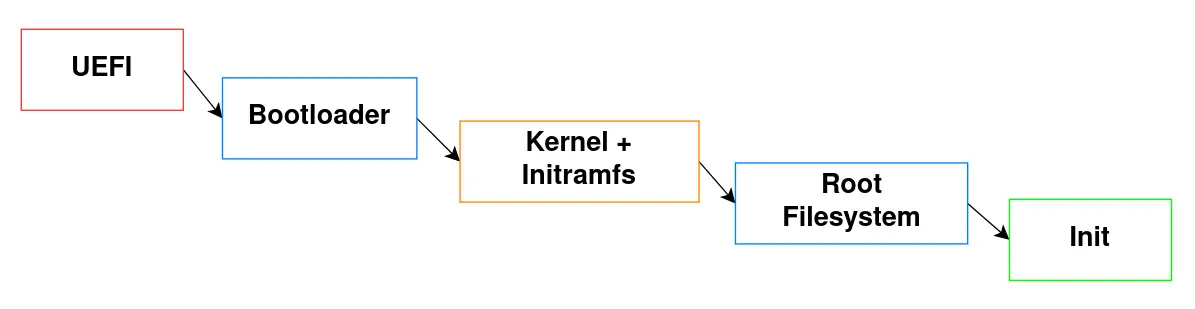
When the machine is powered on, the UEFI firmware runs and takes control, performing a series of checks to ensure the hardware is functioning correctly. Once these are completed, it consults the boot entries stored in NVRAM. Each of these entries contains the full path to an EFI binary (usually a bootloader) located in the EFI partition. Since UEFI is capable of reading FAT file systems, it can locate these binaries, load them into memory, and transfer execution to them.
By running the command sudo efibootmgr, we can see which EFI application will be executed when the system starts:
BootCurrent: 0008
Boot0008* debian HD(1,GPT,75a8d3c7-0bb8-47ff-8f65-68a0d25b71ab,0x800,0x3c800)/File(\EFI\debian\shimx64.efi)
In this case, UEFI will boot the Debian shimx64.efi file, an intermediate bootloader signed by Microsoft that allows Linux to start with Secure Boot enabled. This bootloader transfers execution to the real bootloader, which is usually GRUB (grubx64.efi).
Once GRUB runs, it accesses the boot partition and reads its configuration file grub.cfg. If there are multiple kernel options or operating systems, it displays a boot menu and applies the kernel parameters defined in the configuration. Finally, GRUB loads both the Linux kernel and the initrd into memory and hands off execution of the boot process to the kernel.
/boot/initrd.img-6.12.74+deb13+1-amd64
/boot/vmlinuz-6.12.74+deb13+1-amd64
At this point, the kernel is still compressed, so the first thing it does when executed is decompress and initialize itself, setting up the basic hardware environment: CPU, RAM, buses, and essential devices. To continue, the kernel needs to mount the root partition, but it does not have built-in support for all possible storage configurations such as RAID, LVM, encrypted disks, different file systems, etc. (including all of this in the kernel would make it very heavy).
For this reason, the kernel mounts the initrd, a compressed filesystem loaded into RAM that contains all the modules and utilities needed for the system’s specific hardware. In this phase, scripts are executed that allow, for example, decrypting disks, mounting RAID or LVM volumes, and preparing everything necessary to finally mount the root filesystem (/) and continue booting the operating system.
Once the root partition is mounted, the init or systemd process is executed. This process initializes all system services, such as:
- Mounting other partitions (home, var, boot, etc.)
- Network configuration
- Starting daemons and essential services
- Launching the graphical interface, if applicable
Tampering with the boot process
In a typical full-disk encryption setup, the EFI System Partition (ESP) and /boot remain unencrypted. They contain the bootloader, kernel, initramfs and other configuration files required during early boot.
This introduces an important weakness: an attacker with physical access to the machine can boot from an external Linux environment, mount these partitions and tamper with the boot components without ever having to bypass LUKS encryption.
For example, the attacker could extract the initramfs, modify the userspace utilities or scripts involved in the disk-unlocking process, and inject malicious code into the early userspace environment.
Since the initramfs runs with root privileges, this provides an interesting attack surface. Once the legitimate user enters their passphrase and the encrypted root filesystem is unlocked, the modified initramfs could tamper with critical system files, establish persistence through mechanisms such as /etc/crontab, or deploy a backdoor providing remote root access.
The key point is that the attacker does not need to compromise the encryption itself. Instead, they compromise the code responsible for bringing the encrypted system online. LUKS continues to work as intended, but the integrity of the system is already compromised before the root filesystem is even mounted.
What if we encrypt /boot?
Encrypting /boot might seem like a reasonable solution. GRUB supports encrypted boot partitions, allowing us to protect the kernel, initramfs and other boot files from direct modification.
However, this does not eliminate the attack surface. It simply moves it further down the boot chain.
GRUB must still be accessible to the firmware, so its EFI executable remains in the unencrypted ESP.
An attacker could modify this executable to execute malicious code before requesting the LUKS passphrase. For example, a compromised bootloader could capture the passphrase as the user enters it, effectively bypassing the protection provided by disk encryption.
Ultimately, encrypting the disk protects the confidentiality of data at rest, but it does not guarantee the integrity of the software used to access that data.
Without a mechanism to authenticate the boot components, there is no guarantee that the system being unlocked is the system you originally installed.
Understanding Secure Boot
Secure Boot addresses this problem by establishing a mechanism to authenticate boot components before executing them.
Rather than allowing the firmware to execute any EFI binary found on the ESP, Secure Boot restricts execution to binaries authorized by a set of trusted cryptographic keys and signatures.
To understand how this works, we first need to look at UEFI and its trust model.
UEFI and the Secure Boot key hierarchy
UEFI is the firmware interface responsible for initializing the hardware and loading the first EFI executable during startup.
It also provides a mechanism for maintaining boot entries in NVRAM. Each entry identifies an EFI executable, usually a bootloader, located on an EFI System Partition.
Secure Boot extends this process by introducing a hierarchy of cryptographic keys and signature databases.
These are stored in UEFI NVRAM:
- Platform Key (PK): establishes ownership of the platform and authorizes changes to the Key Exchange Key database.
- Key Exchange Keys (KEK): authorize updates to the signature databases.
- Signature Database (db): contains trusted certificates, public keys and hashes used to authorize EFI executables.
- Forbidden Signature Database (dbx): contains revoked certificates, keys and hashes. Executables matching these entries must be rejected.
The hierarchy separates two responsibilities: controlling who can modify the Secure Boot policy and determining which executables are allowed to run.
The PK establishes the platform owner. KEK entries authorize updates to db and dbx. These databases determine which EFI binaries are trusted or explicitly forbidden.
The distinction is important because the firmware does not need to trust every executable individually. It only needs to trust the certificates used to sign them.
How executable authentication works
Most signed EFI executables use Authenticode signatures.
The signing process works as follows:
- The executable is hashed using a cryptographic hash function.
- The resulting digest is signed using the signer's private key.
- The signature and associated certificate information are embedded in the executable.
When the firmware loads an EFI executable, it verifies the signature using the corresponding public key or certificate.
It checks that the signature is valid, that the signer is trusted according to db, and that the executable has not been revoked through dbx.
If these checks succeed, the firmware allows execution. Otherwise, the executable is rejected.
An important property of this mechanism is that the signature authenticates the executable's contents. Modifying the binary invalidates its signature, regardless of whether the modification is malicious or legitimate.
Notice that this does not prevent an attacker from modifying files on the ESP. It changes what happens when the machine attempts to execute them: unauthorized modifications are detected and rejected.
There is, however, an important limitation.
The firmware only authenticates the EFI executable it is about to load. Once execution is transferred to that application, the firmware does not automatically authenticate every subsequent component in the boot process.
This is where the concept of a chain of trust becomes relevant.
Extending the chain of trust
A chain of trust is a sequence of verification steps in which each trusted component authenticates the next one before transferring execution to it.
The initial trust anchor is the UEFI firmware, which relies on its Secure Boot databases. Subsequent boot components must implement their own verification mechanisms to extend that trust.
Consider a typical Linux installation using Microsoft's signed shim and GRUB:
UEFI Firmware
     |
     | Verifies shimx64.efi against db
     v
Microsoft-signed shim
     |
     | Verifies GRUB using trusted certificates
     v
GRUB
     |
     | Verifies the signed kernel
     v
Linux Kernel
     |
     v
initramfs
     |
     v
Root filesystem
The exact implementation depends on the distribution and boot configuration, but the underlying principle remains the same.
1. UEFI → shim
The firmware loads shimx64.efi from the ESP and verifies its signature against the trusted certificates in db.
Most Linux distributions use a shim executable signed by Microsoft, allowing it to run on machines that include Microsoft's third-party UEFI signing certificate.
Shim acts as an intermediate bootloader, providing a way for Linux distributions to establish their own trust policy without requiring users to replace the firmware's existing keys.
2. shim → GRUB
Once shim starts, it becomes responsible for verifying subsequent boot components.
It contains a vendor certificate used to authenticate distribution-specific bootloaders. GRUB must be signed by a key trusted by shim.
Shim also supports Machine Owner Keys (MOK), allowing users to enroll additional certificates and extend the trust policy without modifying the firmware's Secure Boot databases.
MOK is particularly useful when working with custom kernels or boot components that are not signed by the distribution.
3. GRUB → Linux kernel
GRUB can use shim's verification infrastructure through the shim_lock protocol to authenticate kernels before loading them.
When verification is enforced, an unsigned or improperly signed kernel cannot be executed through this path.
The Linux kernel can also enable additional restrictions through its lockdown mechanism when booted under Secure Boot, limiting operations that could compromise kernel integrity.
At this point, we have extended the original firmware trust decision to the kernel. However, there is still a component that deserves particular attention.
The initramfs problem
In a traditional Linux installation, the kernel and initramfs are separate files:
/boot/
├── vmlinuz-linux
└── initramfs-linux.img
Verifying the kernel does not necessarily authenticate the initramfs loaded alongside it.
An attacker could replace the initramfs while leaving the signed kernel untouched. The system would then execute a legitimate kernel using a modified early userspace environment.
This is precisely the kind of attack we wanted to prevent: malicious code running before the encrypted root filesystem is unlocked.
One way to address this is through Unified Kernel Images (UKIs).
A UKI packages the kernel, initramfs and kernel command-line parameters into a single PE/COFF executable:
Unified Kernel Image
├── Kernel
├── Initramfs
├── Kernel command line
└── Other metadata
Instead of authenticating several independent files, we can sign the resulting image as a single executable.
The firmware or bootloader can then verify the UKI before executing it. Because the signature covers the image's contents, modifying the embedded kernel, initramfs or command line invalidates the signature.
This gives us a much stronger property: the kernel and the early userspace environment responsible for unlocking the encrypted filesystem are authenticated together.
What does this actually protect us against?
We can now revisit the attacks described earlier.
An attacker could still modify the ESP, but the consequences are different depending on which component is targeted.
Replacing systemd-bootx64.efi with a modified executable invalidates its signature, so the firmware rejects it.
Replacing a UKI with an unauthorized binary also causes signature verification to fail before execution.
In each case, the attacker can modify the files on disk, but cannot silently introduce arbitrary code into the authenticated boot chain.
This is the fundamental security property we were missing with disk encryption alone.
However, Secure Boot is not a guarantee that every component involved in booting Linux is trustworthy. Its protection depends on how the chain is constructed and which components are actually verified.
For example, previously signed but vulnerable binaries may remain usable unless they are revoked. Similarly, Secure Boot does not automatically authenticate every external configuration file or protect against compromised firmware.
It also does not protect against attacks targeting the system after it has booted.
The goal is not to eliminate every possible attack, but to establish a verifiable chain of trust from the firmware to the operating system.
My Arch Linux setup
The goal is a relatively simple installation:
- Arch Linux
- LUKS2 full-disk encryption
- Btrfs with separate subvolumes
- systemd-boot
- Unified Kernel Images
- Secure Boot with my own signing keys
- TPM2-backed automatic disk unlocking
- Minimal GNOME installation
The ESP remains unencrypted because the firmware needs to access the EFI executables. Secure Boot ensures that the boot components are authenticated before execution.
1. Prepare the installation environment
Download the Arch Linux ISO and boot from the USB drive in UEFI mode.
For the initial installation, temporarily disable Secure Boot in the firmware settings. We will configure our own signing keys and enable it again later.
Set the keyboard layout:
loadkeys en
Connect to Wi-Fi:
iwctl
Inside iwctl:
station wlan0 scan
station wlan0 get-networks
station wlan0 connect YOUR_WIFI
exit
Synchronize the system clock:
timedatectl set-ntp true
2. Partition the SSD
Identify the target disk:
lsblk -o NAME,SIZE,MODEL,TYPE,FSTYPE
For this example, the SSD is /dev/nvme0n1.
We will create two partitions:
- A 1 GiB EFI System Partition.
- An encrypted Linux root partition using the remaining space.
The following commands will destroy the existing partition table. Make sure DISK points to the correct device.
DISK=/dev/nvme0n1

sgdisk -Z "$DISK"

sgdisk \
  -n1:0:+1G -t1:ef00 -c1:EFI \
  -n2:0:0 -t2:8309 -c2:LINUXROOT \
  "$DISK"

partprobe "$DISK"
sgdisk -Z removes the existing partition tables. The subsequent commands create the EFI partition and the Linux LUKS partition.
Check the result:
lsblk "$DISK"
3. Configure LUKS2 encryption
Encrypt the root partition:
cryptsetup luksFormat --type luks2 /dev/nvme0n1p2
You will be asked to confirm the operation and enter an initial passphrase.
Open the encrypted volume:
cryptsetup open /dev/nvme0n1p2 cryptroot
This creates /dev/mapper/cryptroot, which represents the decrypted device-mapper volume.
Format the EFI partition and the encrypted root device:
mkfs.fat -F32 -n EFI /dev/nvme0n1p1

mkfs.btrfs -f -L archroot /dev/mapper/cryptroot
The EFI partition uses FAT32 because UEFI firmware supports FAT filesystems. Btrfs will be used for the encrypted root filesystem.
4. Configure Btrfs
I use separate Btrfs subvolumes for the root filesystem, home directory, logs and package cache.
Create them:
mount /dev/mapper/cryptroot /mnt

btrfs subvolume create /mnt/@
btrfs subvolume create /mnt/@home

umount /mnt
Mount the root subvolume:
mount -o noatime,compress=zstd:1,subvol=@ \
  /dev/mapper/cryptroot /mnt
Create the mount points:
mkdir -p /mnt/{home,efi}
Mount the home subvolume:
mount -o noatime,compress=zstd:1,subvol=@home \
  /dev/mapper/cryptroot /mnt/home
Finally, mount the EFI partition:
mount /dev/nvme0n1p1 /mnt/efi
5. Install Arch Linux
Install the base system and the tools required for the rest of the configuration:
pacstrap -K /mnt \
  base linux linux-firmware mkinitcpio \
  intel-ucode cryptsetup btrfs-progs dosfstools \
  sbctl tpm2-tss networkmanager sudo nano git efibootmgr
Generate the filesystem table:
genfstab -U /mnt > /mnt/etc/fstab
Enter the new installation:
arch-chroot /mnt
6. Configure the base system
Set the timezone:
ln -sf /usr/share/zoneinfo/Europe/Madrid /etc/localtime
hwclock --systohc
Configure the locales:
nano /etc/locale.gen
Uncomment:
en_US.UTF-8 UTF-8
Generate them:
locale-gen
Set the system language and keyboard layout:
echo "LANG=en_US.UTF-8" > /etc/locale.conf
echo "KEYMAP=en" > /etc/vconsole.conf
Set the hostname:
echo "laptop" > /etc/hostname
Create your user:
useradd -m -G wheel -s /bin/bash YOUR_USERNAME
passwd YOUR_USERNAME
Configure sudo:
EDITOR=nano visudo
Uncomment the following line:
%wheel ALL=(ALL:ALL) ALL
7. Configure the initramfs and generate a UKI
This is one of the most important parts of the installation.
We will use the systemd-based initramfs provided by mkinitcpio. The sd-encrypt hook integrates with systemd-cryptsetup and allows us to unlock the LUKS volume during early boot.
Edit the mkinitcpio configuration:
nano /etc/mkinitcpio.conf
Set the hooks:
HOOKS=(base systemd autodetect microcode modconf kms keyboard sd-vconsole block sd-encrypt filesystems fsck)
The important hooks are:
systemd: uses systemd as the initramfs userspace.microcode: includes CPU microcode updates.block: provides storage device support.sd-encrypt: enables encrypted volume unlocking.filesystems: provides filesystem support.
Retrieve the UUID of the encrypted partition:
blkid -s UUID -o value /dev/nvme0n1p2
Create /etc/crypttab.initramfs:
nano /etc/crypttab.initramfs
Add:
cryptroot UUID=YOUR_LUKS_UUID - tpm2-device=auto
This tells systemd-cryptsetup which encrypted volume to unlock and allows it to use the TPM2 token when one is enrolled.
For the initial boot, we will still have our passphrase as a recovery mechanism.
Configure the kernel command line:
nano /etc/kernel/cmdline
Add:
rd.luks.name=YOUR_LUKS_UUID=cryptroot root=/dev/mapper/cryptroot rootfstype=btrfs rootflags=subvol=@ rw
These parameters tell the initramfs which LUKS volume to unlock and which device to mount as the root filesystem.
Now create the UKI directory:
mkdir -p /efi/EFI/Linux
Configure the mkinitcpio preset:
nano /etc/mkinitcpio.d/linux.preset
Use the following configuration:
ALL_config="/etc/mkinitcpio.conf"
ALL_kver="/boot/vmlinuz-linux"

PRESETS=('default')

default_uki="/efi/EFI/Linux/arch-linux.efi"
default_cmdline="/etc/kernel/cmdline"
This tells mkinitcpio to generate a Unified Kernel Image containing the kernel, initramfs and command line.
Generate the image:
mkinitcpio -P
Check that the UKI was generated:
ls -lh /efi/EFI/Linux/
You should see:
arch-linux.efi
8. Install systemd-boot
Install the bootloader:
bootctl install --esp-path=/efi
This installs systemd-boot into the EFI System Partition and creates a UEFI boot entry.
Because our UKI is located in EFI/Linux, systemd-boot can discover it automatically.
Check the installation:
bootctl status
9. Configure Secure Boot
We will use sbctl to generate our own Secure Boot keys and sign the EFI executables.
First, check the current firmware state:
sbctl status
Enter the firmware settings and put Secure Boot into Setup Mode. Depending on the firmware version, this may require disabling Secure Boot and clearing the existing Secure Boot keys.
Generate the signing keys:
sbctl create-keys
This creates the Platform Key, Key Exchange Key and database signing key.
Enroll them into the firmware:
sbctl enroll-keys -m
The -m option also preserves Microsoft's certificates, which is useful for compatibility with Microsoft-signed EFI applications and firmware components.
Now sign the UKI:
sbctl sign -s /efi/EFI/Linux/arch-linux.efi
The -s option tells sbctl to save the file in its signing database. This is important because it allows sbctl to keep track of the file and automatically sign it again when it is regenerated.
Sign systemd-boot:
sbctl sign -s /efi/EFI/systemd/systemd-bootx64.efi
For automatic bootloader updates, I also register the systemd-boot binary in /usr/lib and generate its signed counterpart:
sbctl sign -s \
  -o /usr/lib/systemd/boot/efi/systemd-bootx64.efi.signed \
  /usr/lib/systemd/boot/efi/systemd-bootx64.efi
This allows bootctl to use the signed binary when updating systemd-boot, rather than installing an unsigned version.
Run:
bootctl update
Check that the EFI binaries are signed:
sbctl verify
Now reboot and enable Secure Boot in the ASUS firmware settings.
After booting Arch Linux, check the status:
sbctl status
You should see Secure Boot enabled and Setup Mode disabled.
Automatic signing after kernel updates
One important detail: the UKI must be signed again whenever mkinitcpio regenerates it.
Because we registered the UKI with sbctl sign -s, sbctl can keep track of it. Its pacman hook automatically signs tracked files after relevant package updates.
When the Linux kernel is updated, mkinitcpio regenerates the UKI and the sbctl hook signs the resulting image.
This means you do not need to manually sign the UKI after every kernel update.
The additional signed systemd-boot binary handles the bootloader update case described above.
10. Configure TPM2 and LUKS automatic unlocking
Now that Secure Boot is working, we can configure the TPM to unlock the encrypted root filesystem automatically.
First, check that systemd detects the TPM:
systemd-cryptenroll --tpm2-device=list
Generate a recovery key:
systemd-cryptenroll --recovery-key /dev/nvme0n1p2
Save this recovery key somewhere safe and offline. It is your recovery mechanism if the TPM becomes unavailable or the PCR policy no longer matches.
Now enroll the TPM:
systemd-cryptenroll \
  --tpm2-device=auto \
  --tpm2-pcrs=7 \
  /dev/nvme0n1p2
This creates a TPM-backed LUKS2 token whose secret can only be released when the configured PCR policy is satisfied.
We use PCR 7 because it measures the Secure Boot policy, including the Secure Boot state and the firmware's enrolled certificates.
This means that changes to the Secure Boot configuration can prevent automatic unlocking.
One important distinction: PCR 7 does not directly measure the contents of the UKI. The UKI's integrity is enforced by Secure Boot signature verification. The TPM uses PCR 7 to bind the unlocking secret to the trusted Secure Boot policy.
This is a relatively stable configuration compared with binding directly to PCRs that change with every kernel update.
Check the resulting LUKS configuration:
cryptsetup luksDump /dev/nvme0n1p2
You should see the enrolled TPM2 token and the additional keyslots.
11. Install a minimal GNOME environment
Install GNOME Shell and its main components:
pacman -S \
  gnome-shell \
  gnome-session \
  gdm \
  gnome-control-center \
  nautilus \
  gnome-terminal
Install desktop integration and audio support:
pacman -S \
  xdg-user-dirs \
  xdg-desktop-portal-gnome \
  gnome-keyring \
  gvfs \
  pipewire \
  pipewire-pulse \
  wireplumber
Install the appropriate graphics drivers.
For Intel:
pacman -S mesa vulkan-intel
For AMD:
pacman -S mesa vulkan-radeon
Enable the required services:
systemctl enable gdm
systemctl enable NetworkManager
12. Finish the installation
Exit the chroot:
exit
Unmount the installation:
umount -R /mnt
Close the encrypted volume:
cryptsetup close cryptroot
Reboot:
reboot
Your system should now boot using a signed UKI, with Secure Boot enforcing the boot chain and TPM2 providing automatic LUKS unlocking.
The recovery key remains available if the TPM policy cannot be satisfied.